Your Car is Clean – But is it “Clay Bar Clean”?
Removing Stubborn Dirt and Grime With a Quality Clay Bar System
The Nitty-Gritty of Car Care
The Nitty-Gritty of Car Care
 So you wash your car once a week and keep it garaged whenever it’s not on the road. Your car’s paint must be super clean, right?
Wrong.
Your paint is not perfectly smooth and can trap contaminants. When you wash your car, you only rid your paintwork of superficial contaminants. These trapped particles cannot be removed by a simple wash and dry. Only a quality clay bar system can truly get your car clean.
If you want a truly radiant paint finish, you need to clay bar your vehicle’s paint.
 Using a bar of clay on your car can, at onset, sound horrifying. “Paddock,” you might crow, “Clay is made of dirt particles and therefore will scratch the paint!”
Fear not, fair readers!
Clay is not made of dirt particles. In fact, dirt is “dirty” because it contains clay! Clay is made of electrically charged particles that bind dirt together. Without clay, dirt would simply be dust, or sand. The gooeyness of clay at the microscopic level makes it perfect for grabbing trapped particles out of your paint!
Automotive detailing clay can be made from natural clay, but is usually comprised of synthetic compounds and is specifically engineered for the job to remove stubborn surface contaminants from your vehicle’s paint.
When used properly, detailing clay is completely non-abrasive and is actually preferred over polish by most professional detailers because it doesn’t remove any paint. Because all vehicle paint contains micro-scratches and uneven surfaces that collect dust, pollen, pollution and other particles, the vehicle’s painted surfaces need to be cleaned using detailing clay. It’s an easy process; you will need nothing more than some quality detailing clay, clay lubricant , and a few microfiber towels.
Lesson 1: Clay Bar On, Clay Bar Off
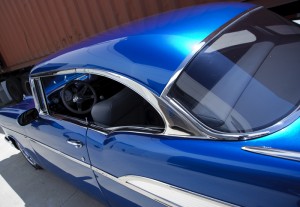
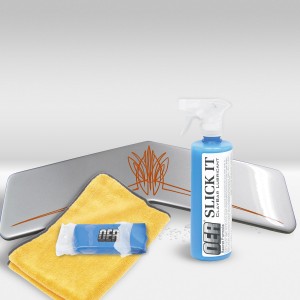
We were so confident with the detailing clay bar’s properties that we decided to subject our test vehicle, a custom 1957 Chevrolet, to a full clay bar regimen. For the ’57 we used OER’s “Secret Formula” Clay Bar System (you might remember we used the “Secret Formula” Citra-Secret Wash a few weeks ago), which advises the use of OER’s “Slick It” clay lubricant for optimal results. The first step – and this is really the most important step – is to wash your car very well, but do not wax it yet! Wax provides a barrier to the surface imperfections and prevents the car from being fully cleaned. Clay bar can remove old wax and glaze, but it will be hindered with new wax on the paint. For our wash, we used a method described earlier and dried the vehicle with compressed air around the panel gaps and trim to make sure the car was properly dried.
We used a piece of clay about the size of a ping-pong ball and spread it into a pancake about 1/4-inch thick and 3-4 inches in diameter. Spraying a 2 ft by 2 ft area liberally with lubricant (on the ’57, we go through a LOT of clay lubricant ), we began by rubbing the clay lightly back and forth across the lubricated surface. We definitely recommend clay barring small areas at a time; it’s way easier to manage.
Initially, the pancake grabs at the surface. This is an indication that there are contaminants coming out of the paintwork and into the clay. When the clay slides across the area without any grabbing, the paint is clean. This can be confirmed by gliding your fingers over the cleaned area. It should feel smooth; if it isn’t, repeat the clay bar process. After each small area was fully clay barred, we wiped off any excess clay residue by spraying it with the Slick It lubricant and wiping it off with a microfiber towel.
Wrapping Up and Shining Through
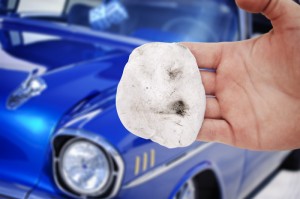
 One important measure we employed while using the clay bar system on the ’57 was to “recycle” the clay periodically to improve its performance. When we had finished three or four small areas, the clay pancake was black around the edges where it had contacted the paint. All the dirt removed from the paintwork had collected in these areas and was impeding the performance of the clay. The easiest way to “recycle” the clay is to roll the edges of the pancake into the center and roll it back into a ball and once again into a pancake. We simply repeated the clay bar process on all other areas of the car’s paint and even used the clay bar on the glass and large pieces of chrome; clay is perfect for removing sap and other contaminants from chrome and glass!
The final step of the clay bar process is also very important: the paint is now naked and vulnerable and the car needs a wax or sealant. Because clay removes everything from the scratches and blemishes in the paint, there may no longer be anything to protect your paint from the harmful effects of the sun and the elements. We followed up our clay bar process with OER Secret Weapon Sealant+Carnauba
With the clay bar and fresh wax, our Chevy’s paint looked and felt extremely clean and even caught light more brilliantly than before. Furthermore, by removing harmful contaminants such as pollution and brake dust, our Chevy’s custom paint now has more durable protection that will last for some time. So if you want a truly radiant paint finish, free from all surface imperfections and corrosive material, you need to clay bar your vehicle’s paint.
Special thanks to Classic Industries for providing the products we used: OER Clay Bar . OER Slick It Clay Bar Lubricant . Microfiber Towels
See all of OER’s Secret Formula Car Care products here .
[portfolio_slideshow size=large]
- February 29, 2012 - FEATURED BUILDS
- February 29, 2012 - Original Equipment Reproduction


